
Think packing is just about clothes? Try bringing the wrong kit above 4,000 meters.
Altitude makes cold, UV, and low oxygen real threats, and about 75% of trekkers above 3,000 meters get some form of altitude sickness.
This packing list for high-altitude trekking lays out the exact items you need to stay warm, hydrated, and safe, a minimum, decision-ready checklist for summit attempts and multi-day exposure.
Follow it as your default, then tweak for pace, budget, and route.
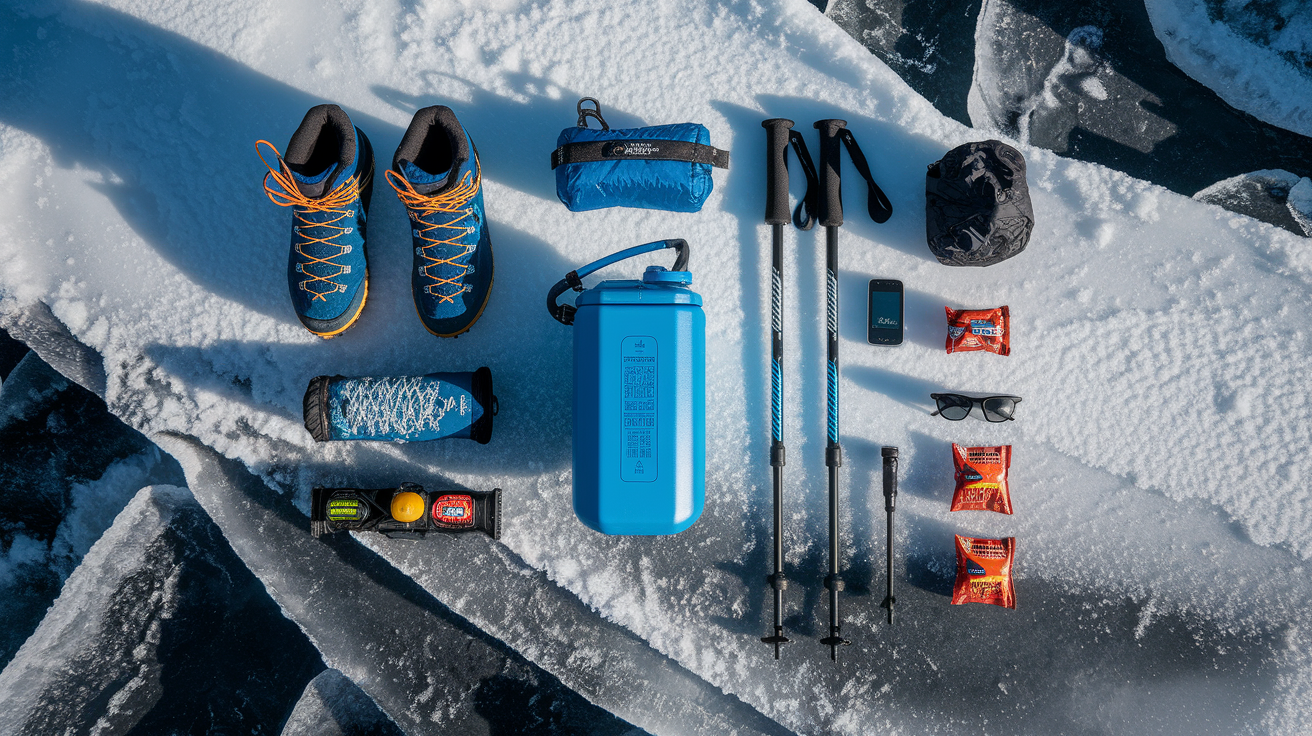
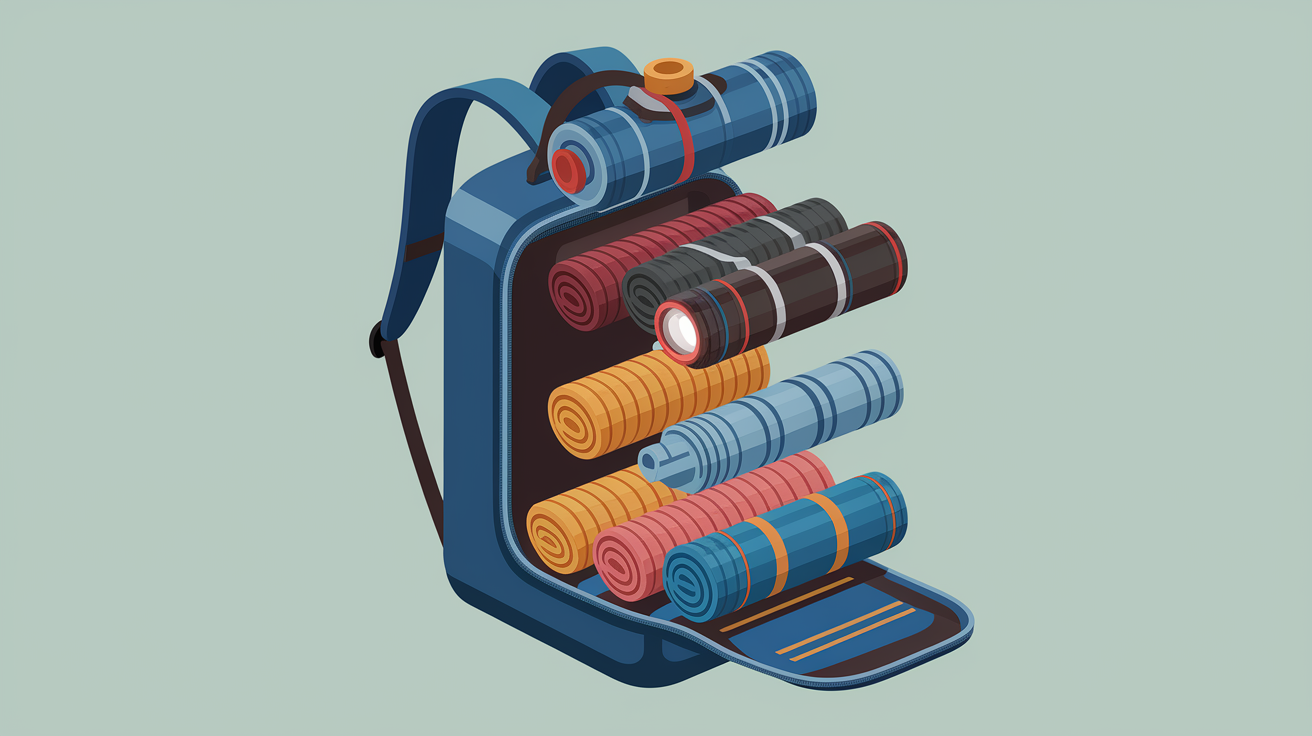
High‑Altitude Trekking Essentials Checklist
At elevations above 3,000 meters, your gear becomes life support equipment. You’re packing for extreme cold, intense UV radiation, reduced oxygen, and rapidly changing weather that can shift from calm sun to whiteout in under an hour.
Core high‑altitude essentials:
- Moisture‑wicking base layer set (top and bottom)
- Mid‑weight fleece or synthetic insulation jacket
- Waterproof/breathable shell jacket with hood
- Insulated mountaineering boots with ankle support
- Liner gloves plus insulated outer mitts
- Trekking poles with snow baskets
- 2–3 liter hydration system (bladder plus backup Nalgene)
- Headlamp with two spare battery sets
- Comprehensive blister kit with moleskin and duct tape
- SPF 50+ sunscreen (minimum 10 oz for week‑long treks)
- UV‑blocking sunglasses or glacier goggles
- Compact emergency blanket or bivy sack
- Map, compass, and backup GPS device
- High‑calorie energy bars (plan 30+ for one week)
- Down‑filled insulated jacket (650–800 fill power)
This isn’t a comfort list. Every item addresses a specific altitude‑related hazard: cold injuries, dehydration, UV burns, disorientation, or energy depletion. If you’re heading above 4,000 meters, this checklist represents the minimum threshold for safe summit attempts and multi‑day exposure.
Understanding High‑Altitude Conditions and Challenges

Above 2,500 meters, the air holds roughly 25% less oxygen than at sea level. By 4,500 meters, you’re working with about half the oxygen your body expects. That slows digestion, clouds judgment, and makes even small pack weight feel significant.
At the same time, UV radiation intensifies by 10–12% for every 1,000 meters of elevation gain. Temperatures can swing 30°F between midday and pre‑dawn.
Altitude sickness affects roughly 75% of trekkers above 3,000 meters. Symptoms typically begin 12–24 hours after arrival: headache, nausea, reduced exercise tolerance, disrupted sleep. Ignore early warning signs and mild acute mountain sickness (AMS) can escalate into life‑threatening pulmonary or cerebral edema within hours.
Gear addresses these altitude‑specific challenges by:
- Layering systems that adapt to rapid temperature shifts without adding bulk
- Hydration reservoirs and purification tools that counter the dehydration caused by faster respiration
- Full‑spectrum UV protection for eyes and skin to prevent snow blindness and severe burns
- Emergency oxygen, medications, and pulse oximeters to monitor and respond to AMS symptoms
- Calorie‑dense food that compensates for appetite suppression at elevation
Every piece of technical gear on this list exists because altitude compounds normal trekking risks. Cold drains batteries faster. Wind cuts through standard rain jackets. Dehydration happens before you feel thirsty.
Clothing Systems for Extreme Elevation
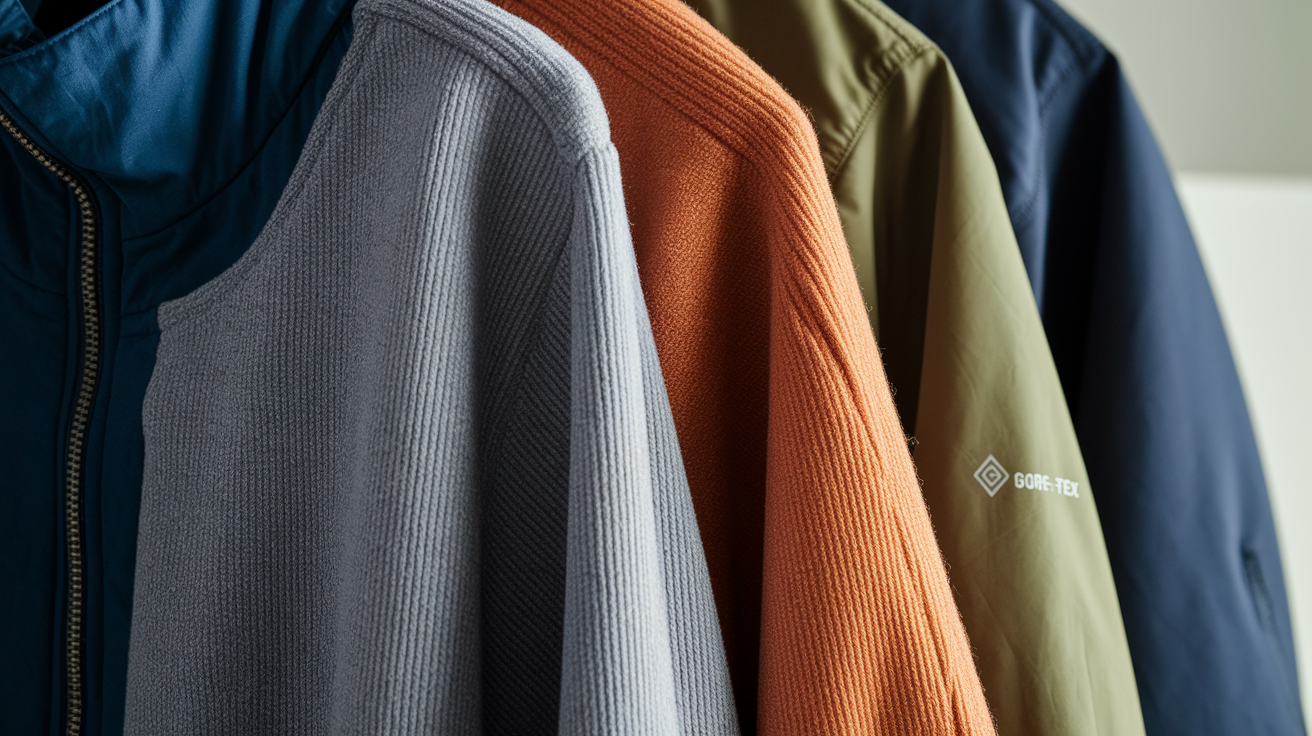
High‑altitude layering follows a strict three‑tier system: base layer for moisture transport, insulation layer for heat retention, and shell layer for wind and precipitation protection.
Start with a merino wool or high‑quality synthetic base layer set. Merino regulates temperature naturally and resists odor even after multiple days of wear, which matters when washing options disappear above the tree line. Bring two full sets so you can rotate one while the other dries inside your sleeping bag.
Your insulation layer should be a lightweight fleece jacket or synthetic mid‑layer, plus a compressible down jacket rated for 0–20°F. A quality down jacket with 650–800 fill power becomes your wearable sleeping bag during cold morning starts and summit pushes. Look for a durable shell fabric and a roomy cut that fits over your fleece without restricting arm movement when you’re reaching for trekking poles or adjusting your pack. If purchasing locally in Nepal or similar trekking hubs, expect to pay under $100 for a serviceable down jacket, though it’ll be heavier and bulkier than premium Western brands.
Your outer shell must be waterproof and breathable. Gore‑Tex, eVent, or Pertex fabrics work well, but prioritize a roomy fit that accommodates all your insulation layers underneath. Pair the shell jacket with lightweight waterproof over‑pants that have full‑length side zips for ventilation during steep climbs.
A poncho that covers both you and your pack offers extra protection during sustained rain and doubles as an emergency ground sheet.
Essential high‑altitude clothing accessories:
- Silk or synthetic neck gaiter plus fleece buff for face protection
- Liner gloves (windproof fleece) and waterproof insulated over‑mitts
- Warm beanie and a baseball cap for sun protection
- Snow gaiters to keep boots dry and prevent snow from entering boot cuffs
- Two pairs of mid‑weight wool hiking socks plus two pairs of heavy mountaineering socks for teahouse evenings
Pack 4–6 pairs of chemical hand warmers. At 4,500+ meters, cold numbs fingers faster than you expect. Regaining dexterity when you need to adjust gear or treat a blister can take 20 minutes.
Footwear and Lower‑Body Essentials

Your boots are the single piece of gear you should never rent or borrow. High‑altitude terrain demands insulated mountaineering boots with rigid soles, strong ankle support, and compatibility with crampons if you’re crossing glaciers or ice.
Break them in over at least 30–40 miles of varied terrain before departure so they mold to your foot shape and you identify any pressure points that’ll become blisters under load.
If your trek stays below snow line and you’re carrying a light load, trail runners with aggressive tread are acceptable, but prioritize Gore‑Tex linings for warmth and waterproofing. Wet feet at altitude are a fast track to frostbite.
Pair your boots with three pairs of mid‑weight wool socks for daily rotation and two pairs of expedition‑weight socks for cold camps and teahouse evenings. Wool wicks moisture, insulates even when damp, and resists the odor that synthetic socks develop after a few days without washing.
Lower‑body essentials:
- Waterproof ankle or snow gaiters to seal the gap between boot and pant leg
- One pair of liner socks (optional) to reduce friction if you’re blister‑prone
- Lightweight traction devices (microspikes) for icy morning trails
- Down or synthetic booties for teahouse use (available locally for under $15)
If you have a history of ankle or knee injuries, bring an ACE wrap or lightweight brace. At altitude, a minor twist that would normally slow you down can end a summit attempt.
Safety, Navigation, and Emergency Gear

Reliable navigation and emergency equipment become non‑negotiable when weather closes in or you’re moving before sunrise to reach a summit.
Carry a durable headlamp with a red‑light mode to preserve night vision, plus two full sets of spare batteries stored in an inside pocket so cold doesn’t drain them prematurely. Lithium batteries outperform alkaline in freezing temperatures.
Paper maps and a compass remain your primary navigation tools because electronics fail in cold, batteries die faster at altitude, and GPS satellites can be blocked by canyon walls or thick cloud cover. Supplement analog tools with a GPS communicator that allows two‑way messaging and emergency SOS transmission when you’re beyond cell range. Many high‑altitude routes pass through zones with zero mobile coverage for three or more days at a time.
Core safety and emergency items:
- Compact multi‑tool with pliers, knife, screwdrivers, and scissors
- Lightweight thermal emergency blanket or bivy sack
- Whistle for audible signaling in whiteout or dense fog
- Trauma shears and 15 feet of duct tape (wound around trekking pole for space savings)
- Pre‑built group‑sized first‑aid kit with blister care, wound antiseptic, pain relief, and trauma supplies
- Small roll of climbing‑grade webbing or paracord for emergency repairs
If you’re trekking with a group, designate one person to carry the comprehensive first‑aid kit and make sure at least two members know how to use every item inside.
Pre‑dawn starts for summit attempts mean you’ll be navigating by headlamp on unfamiliar terrain. If you’ve ever sprinted to catch a connection in an airport, you already know how disorienting it is to move fast in low light. Now add thin air and frozen fingers.
Altitude‑Specific Medical and Oxygen‑Related Gear

Altitude sickness is the primary medical threat above 3,000 meters. Carry acetazolamide (Diamox) to aid acclimatization. Standard preventive dosing is one 125 mg tablet twice daily, starting 24 hours before ascent. Bring at least 20 tablets for a week‑long trek. Note that Diamox is a sulfa drug. If you have a sulfa allergy, consult your doctor for alternatives before departure.
For severe altitude illness, dexamethasone (Decadron) is the emergency medication. The standard dose is 4 mg every six hours until symptoms resolve or you descend to a lower elevation. Carry a minimum of 12 tablets. Dexamethasone treats high‑altitude cerebral edema (HACE) and buys time for descent, but it’s not a substitute for losing elevation.
A pulse oximeter lets you monitor blood oxygen saturation (SpO₂) and heart rate in real time. Normal SpO₂ at sea level is 95–100%. At 4,000 meters, expect readings in the 85–92% range. If your SpO₂ drops below 80% or you develop confusion, severe headache, or difficulty walking, descend immediately. Pulse oximeters are small, battery‑powered, and weigh under two ounces.
Altitude‑specific medical additions:
- Portable supplemental oxygen canister (2–4 liters) for emergency use on climbs above 5,000 meters
- Oral rehydration salts (4 packets minimum) to restore electrolyte balance after vomiting or diarrhea
- Anti‑nausea medication (12 tablets of dimenhydrinate, one every four hours as needed)
Altitude suppresses appetite and slows digestion. Nausea is common even without full‑blown AMS. Keeping calories down becomes part of your safety plan.
Hydration, Nutrition, and Water‑Treatment Equipment
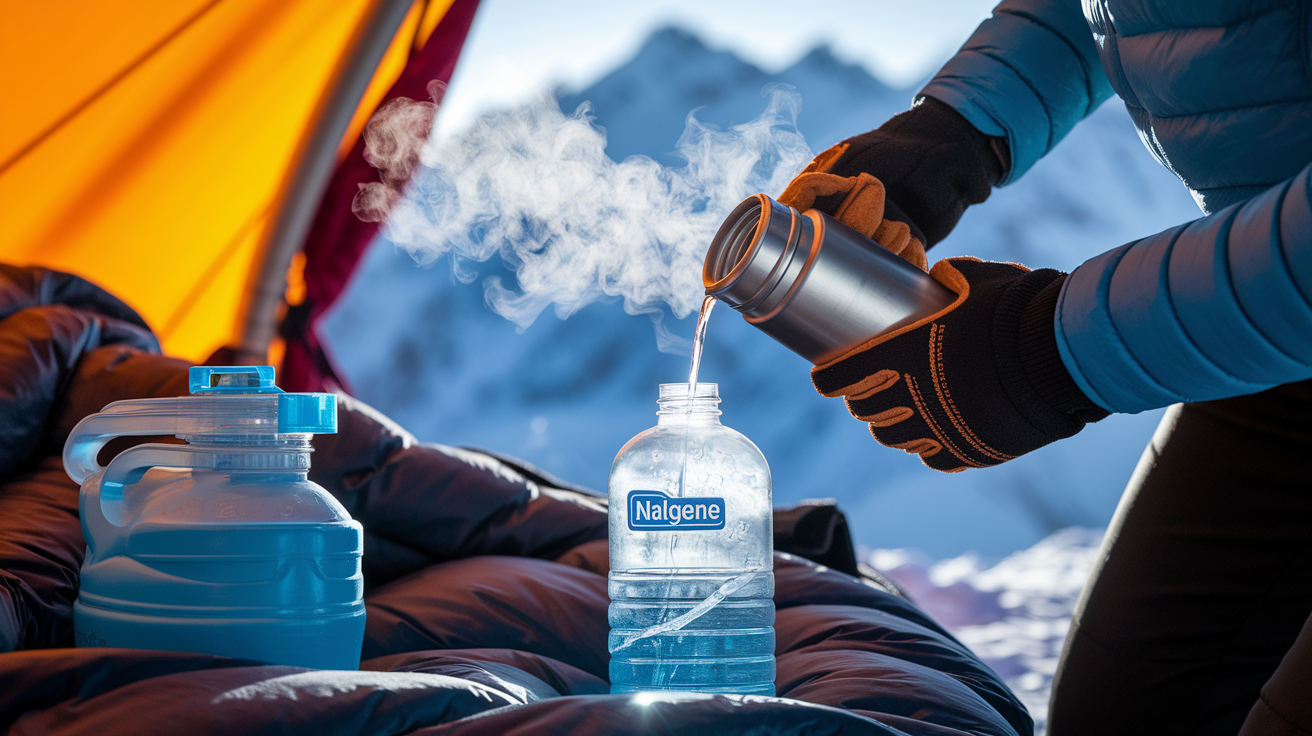
Dehydration accelerates altitude sickness. At elevation, you lose water through faster breathing and increased urination triggered by your body’s acclimatization response. Target a minimum of 3–4 liters of fluid per day. Your urine should be copious and clear. If it’s dark or infrequent, you’re already behind on hydration.
Carry a 2–3 liter hydration bladder as your primary water source, but note that bladder hoses freeze solid above 4,000 meters in cold conditions. Bring at least one wide‑mouth 1‑liter Nalgene bottle as a backup. Nalgene bottles can hold boiling water, and an insulated bottle jacket keeps liquids from freezing overnight.
Fill your Nalgene with hot water before bed and tuck it into your sleeping bag. It doubles as a heat source and ensures you wake up with drinkable water.
Hydration and water treatment essentials:
- Water purification tablets (iodine or chlorine dioxide) for at least 20 liters of treatment capacity
- Lightweight micro‑filter as primary purification (faster and no chemical taste)
- Insulated thermos (1 liter or larger) to prevent freezing and allow hot refills on long summit days
- Electrolyte drink powder for 5+ liters (isotonic formula with sugar and salts)
Bring roughly 3 pounds of high‑calorie snacks to cover the trek. Appetite drops sharply at altitude, and heavy meals feel impossible to finish. Pack around 30 energy bars, plus a mix of salted nuts, dried fruit (unsulfured), chocolate‑covered espresso beans, jerky, and glucose tablets. Favor foods that are salty, sweet, crunchy, or citrus‑flavored. They’re easier to eat when you’re nauseous.
For vegans, nut butter packets and trail mix provide dense protein without refrigeration.
Cold drains energy faster than exertion. Eating every 60–90 minutes, even when you’re not hungry, prevents the blood‑sugar crashes that make altitude symptoms feel worse.
Tools, Accessories, and Trekking Aids
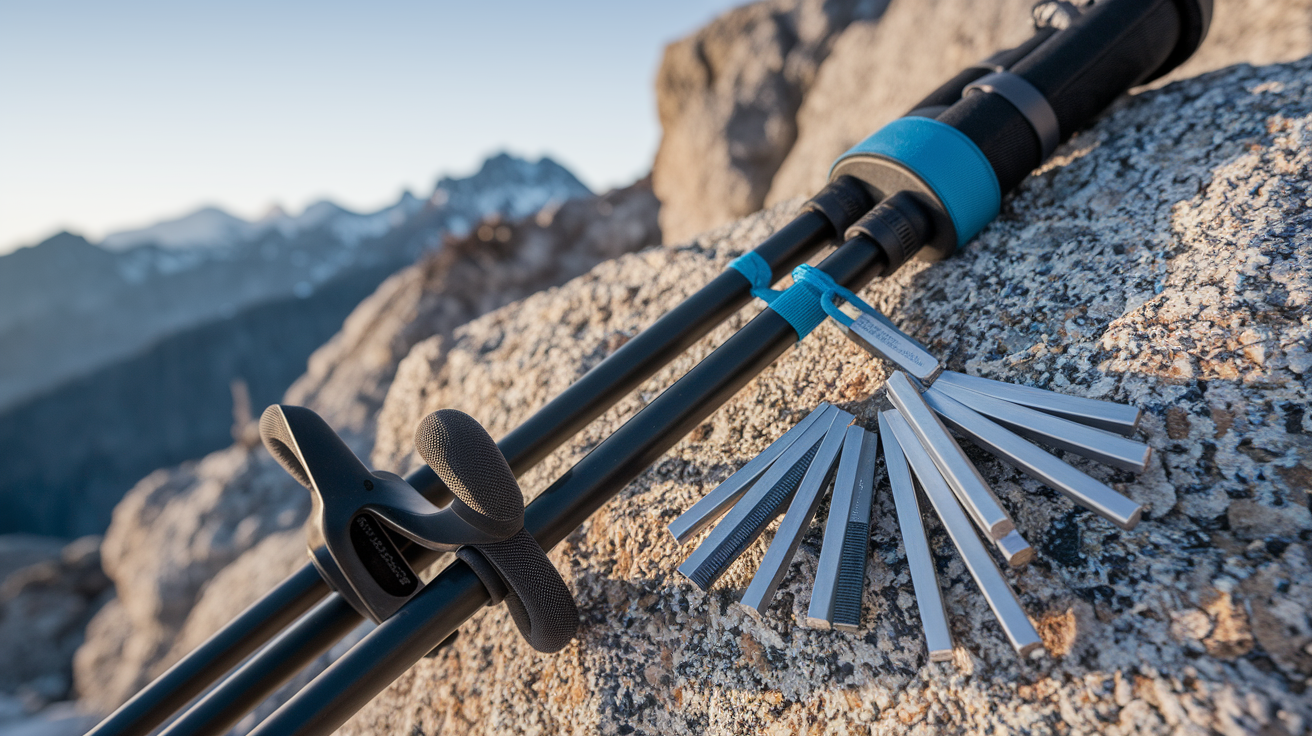
Trekking poles reduce knee strain by up to 30% on steep descents and improve balance on loose scree, ice, and stream crossings. Choose collapsible or folding poles with snow baskets that prevent the tips from sinking into soft snow.
Adjustable poles let you shorten them for climbs and lengthen them for descents, which shifts load and reduces repetitive‑stress injuries over multi‑day treks.
A small multi‑tool handles on‑trail repairs that would otherwise end your trek: tightening a loose boot eyelet, cutting paracord, opening food packaging with cold fingers, or removing a splinter. Look for a durable model with pliers, a sharp knife, multiple screwdrivers, and scissors. Keep it accessible in a jacket pocket or clipped to your pack strap.
Useful trekking accessories:
- Compression stuff sack (waterproof) for sleeping bag, saves pack volume and keeps insulation dry
- Two contractor‑grade garbage bags (3 mil thick) as pack liners for waterproofing
- Lightweight carabiners (3–4) for clipping gear to the outside of your pack or hanging items inside your tent
Duct tape fixes torn shells, secures loose boot soles, reinforces blister dressings, and patches leaking water bladders. Wrap 15 feet around a trekking pole or stuff sack to save space and keep it accessible.
Weight Optimization and Packing Strategy
At 4,500 meters, every extra kilogram feels like three. Pack as if you’re allergic to unnecessary weight, but never sacrifice safety items to save grams.
Start by weighing each piece of gear and deciding whether its function justifies its mass. If an item serves only one purpose and you can improvise a substitute, leave it behind.
Place your heaviest items (water, stove fuel, food) close to your spine and high in the pack, near your shoulder blades. This keeps the center of gravity over your hips and prevents the pack from pulling you backward on steep climbs. Keep frequently used items like snacks, sunscreen, maps, and your first‑aid kit in top‑lid pockets or outer mesh pockets so you don’t have to unpack your entire load every time you need a blister plaster.
Five‑step pack organization for high‑altitude treks:
- Line your main pack with a waterproof contractor bag or pack liner before adding any gear.
- Load soft items like your sleeping bag or down jacket at the bottom to cushion the base and prevent hard objects from damaging the pack fabric.
- Pack heavy items vertically along your back, then fill gaps with medium‑weight gear like clothing layers and your stove.
- Store items you’ll need first thing in the morning (headlamp, breakfast, water purification) at the very top or in external pockets.
- Secure external straps snugly so nothing shifts or swings during descents, which throws off balance and wastes energy.
Compression straps on the sides and bottom of your pack stabilize the load and pull weight closer to your body. Cinch them after every major re‑pack. Use stuff sacks or ziplock bags to separate clean clothes from used layers, toiletries from food, and electronics from anything that could leak or puncture.
For a one‑week high‑altitude trek, a 55–60 liter pack provides enough volume without encouraging overpacking. If you’re carrying a rented sleeping bag (heavier and bulkier than your own), size up to 65 liters. Bring a small foldable daypack for summit‑day pushes when you only need water, an extra jacket, snacks, and emergency gear.
Optional Gear and Brand Examples

Optional items add comfort and capability but aren’t mandatory for completing a high‑altitude trek safely.
A lightweight down vest layers well under your shell and adds warmth without bulk. Available locally in Kathmandu or Pokhara for under $60. A compact umbrella offers hands‑free rain protection and doubles as a sun shade during exposed ridgeline walks. Local versions cost under $15 and weigh less than most rain jackets.
Reliable high‑altitude gear brands include Black Diamond, Osprey, and Mammut for packs and technical equipment. La Sportiva, Scarpa, and Salewa for footwear. Outdoor Research and Marmot for gloves and shells. Petzl for headlamps. Sea to Summit for compression sacks and drybags. These manufacturers design for extreme conditions and back their products with warranties that matter when gear fails 50 miles from the nearest road.
Optional add‑ons that enhance multi‑day treks:
- Solar charger or high‑capacity power bank (10,000+ mAh) to keep electronics topped up when teahouses lack outlets
- Camera with 3–4 lithium batteries stored in an inside pocket to prevent cold‑induced shutdowns
- Lightweight camp chair or sit pad for rest breaks on cold rock
- Packable down booties for teahouse evenings when your boots are drying and your feet need insulation
Photography gear adds weight fast. If you’re serious about capturing high‑altitude landscapes, carry your camera in an inside jacket pocket to keep batteries warm and prevent condensation when moving between extreme cold and warm interiors. Strap it to your wrist or neck rather than storing it deep in your pack. You’ll miss shots during the short weather windows when clouds lift and peaks emerge.
Final Words
Packed and ready: this guide gave you a scannable essentials checklist and clear reasons why gear changes at elevation, covering layers, insulated boots, safety and altitude medicine, hydration, and navigation tools.
Treat the 12 to 15 core items as the minimum for safety and comfort. Use the layering system, crampon-compatible boots, a pulse oximeter if you’ll need one, and the five packing steps to keep weight balanced.
Use this packing list for high-altitude trekking as your base. Pack smart, give yourself time to acclimatize, and enjoy the climb with confidence.
FAQ
Q: What are the essential items for high‑altitude trekking?
A: The essential items for high‑altitude trekking are base layers, insulating layers, a waterproof shell, insulated mountaineering boots, gloves/mitts, trekking poles, hydration system, headlamp, SPF50+ sunscreen, UV‑400 sunglasses, emergency blanket, map, and snacks.
Q: Why does packing differ for high altitude and how does gear help?
A: Packing for high altitude differs because lower oxygen, stronger UV, colder temperatures, and rapid weather increases risk; gear like layering, hydration systems, UV eyewear, and altitude medical items reduces those hazards.
Q: What clothing layers should I bring for extreme elevation?
A: The clothing layers to bring are moisture‑wicking base layers, breathable mid layers, warm insulating pieces (down or synthetic), and a waterproof windproof shell; add balaclava, liner gloves, gaiters, down mitts, and thermal socks.
Q: What footwear and lower‑body gear do I need?
A: The best lower‑body gear for high altitude includes insulated, crampon‑compatible mountaineering boots with strong ankle support, moisture‑wicking thermal socks, and gaiters; size boots for thick socks and a thumb’s space.
Q: What safety, navigation, and emergency gear is required?
A: The core safety and navigation gear you need are a reliable headlamp, whistle, compact first‑aid kit, thermal blanket, GPS device plus map and compass as an analog backup, and a charged power bank.
Q: What altitude‑specific medical and oxygen items should I carry?
A: The altitude‑specific medical and oxygen items to carry include acetazolamide for prevention, a pulse oximeter to monitor oxygen saturation, portable oxygen canisters for emergencies, and oral rehydration or electrolyte salts.
Q: What hydration and water‑treatment equipment is essential?
A: The hydration and water‑treatment essentials are an insulated bottle or hydration bladder, a filter or purification tablets, electrolyte salts, and calorie‑dense snacks to replace fluids and energy lost through faster breathing.
Q: What tools and small accessories are useful on high‑altitude treks?
A: The useful tools and accessories include adjustable trekking poles to reduce knee strain, a multi‑tool for repairs, dry bags for gear protection, carabiners, and durable repair tape.
Q: How should I pack to optimize weight and balance?
A: The packing strategy is heavy items close to your spine, frequently used items in top pockets, soft items as padding, balance left and right, and aim to minimize base weight for better endurance.
Q: What optional gear can improve comfort or function?
A: The optional gear to consider includes a high‑capacity power bank, compact camera or phone stabilizer, camp pillow, spare down jacket, and extra battery packs rated for cold conditions.