
Think a heavy parka and good boots are enough for an Arctic trip?
They’re not.
When temperatures drop to −40°F and wind can steal heat in minutes, packing becomes a survival plan.
This post gives a clear, checkable packing list for extreme cold.
You’ll get exact items, backup rules, weight limits, and quick decision rules so you don’t overpack or leave something life-saving behind.
Read on to learn what to bring, how many pieces, and which tradeoffs are worth it for polar safety.
Essential Gear Overview for Extreme-Cold Polar Expedition Packing

When you step off the plane at a polar gateway town, you’re committing to an environment where air temperatures can drop to −40°F and wind chill can turn survival into a matter of minutes without the right protection. Polar expeditions during summer months usually see conditions hovering near freezing during the day, but recorded lows around 20°F without wind chill are common. Season-edge trips or exposed overland travel can bring you face to face with the kind of cold that freezes moisture inside your nostrils in seconds.
Your packing strategy needs to prioritize three things: survival, redundancy, and weight. Every piece of gear needs a clear job, keeping you warm, dry, fed, oriented, or safe. Critical items like gloves, socks, and batteries need backups because when something fails in −30°F, there’s no corner store. At the same time, strict luggage weight limits on charter flights to gateway towns mean you can’t pack your entire garage. The 23 kg (50 lb) checked bag limit is real, and expedition operators enforce it.
Here’s what you must pack for a polar expedition into extreme cold:
Layering system: thermal base layers (merino or synthetic), insulating midlayers (fleece plus down or synthetic jacket), waterproof and windproof outer shell (Gore-Tex or equivalent).
Footwear: knee-high waterproof boots for wet landings, insulated −40°F rated boots for overland polar travel.
Hand, head, and face protection: waterproof mittens with liners, warm hat, balaclava or neck gaiter, UV-blocking sunglasses, ski goggles.
Camping and shelter: four-season tent, sleeping bag rated to −30°F to −40°F, sleeping pad with R-value ≥5.
Navigation and comms: GPS device, paper maps, compass, personal locator beacon (PLB) or satellite messenger, headlamp with spare batteries.
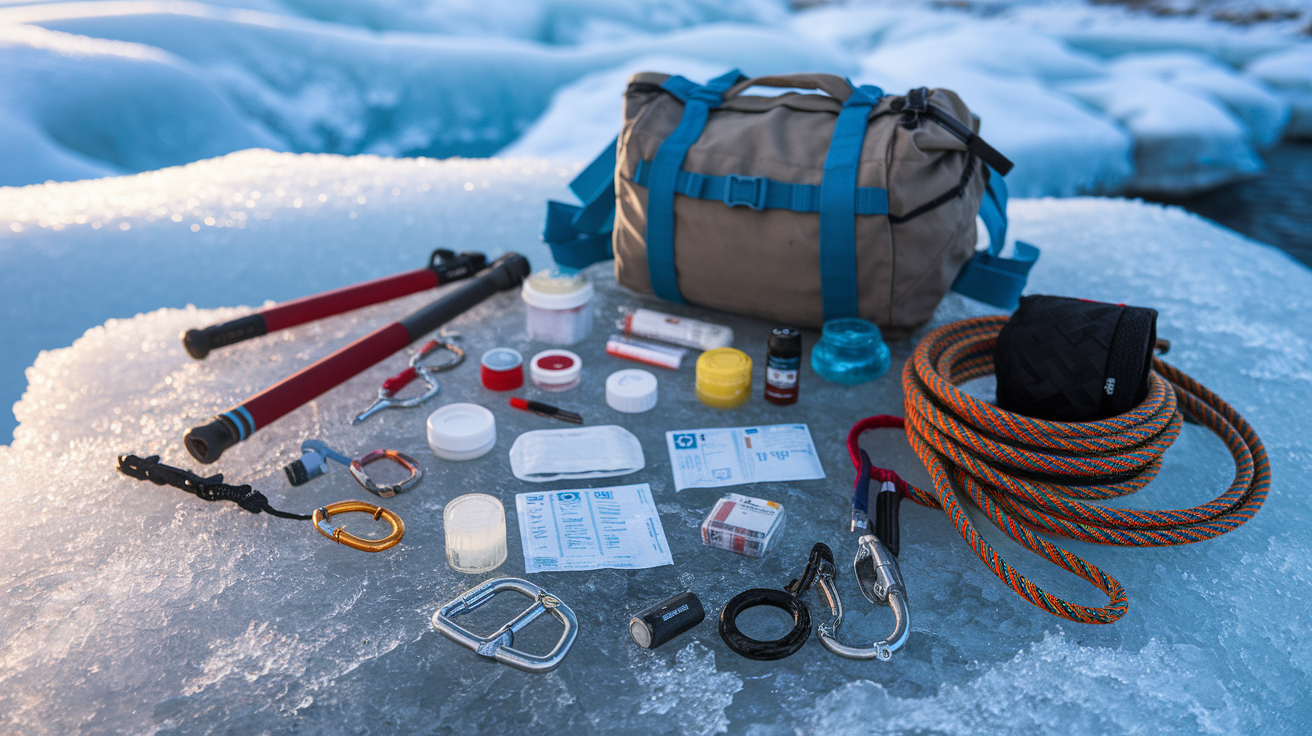
Emergency medical and rescue: expedition first aid kit, seasickness meds, chemical warmers, crevasse rescue gear (harness, ice axe, crampons, ropes) if glacier travel is planned.
Food and hydration: 4,000 to 6,000 kcal/day in compact, high-calorie foods, insulated thermos and snow-melting fuel.
Electronics: camera with 3 to 4 spare batteries, multiple SD cards, power bank rated for cold, voltage adapter.
Luggage: 65 to 100L soft-sided duffel or backpack, waterproof dry bags for wet transfers.
Biosecurity compliance: clean boots and clothing, no organic contaminants, no cotton.
Every section that follows breaks down these categories in detail, with specific quantities, technical specs, and decision frameworks so you pack exactly what you need and nothing you don’t.
Layering System Essentials for Polar Expedition Clothing
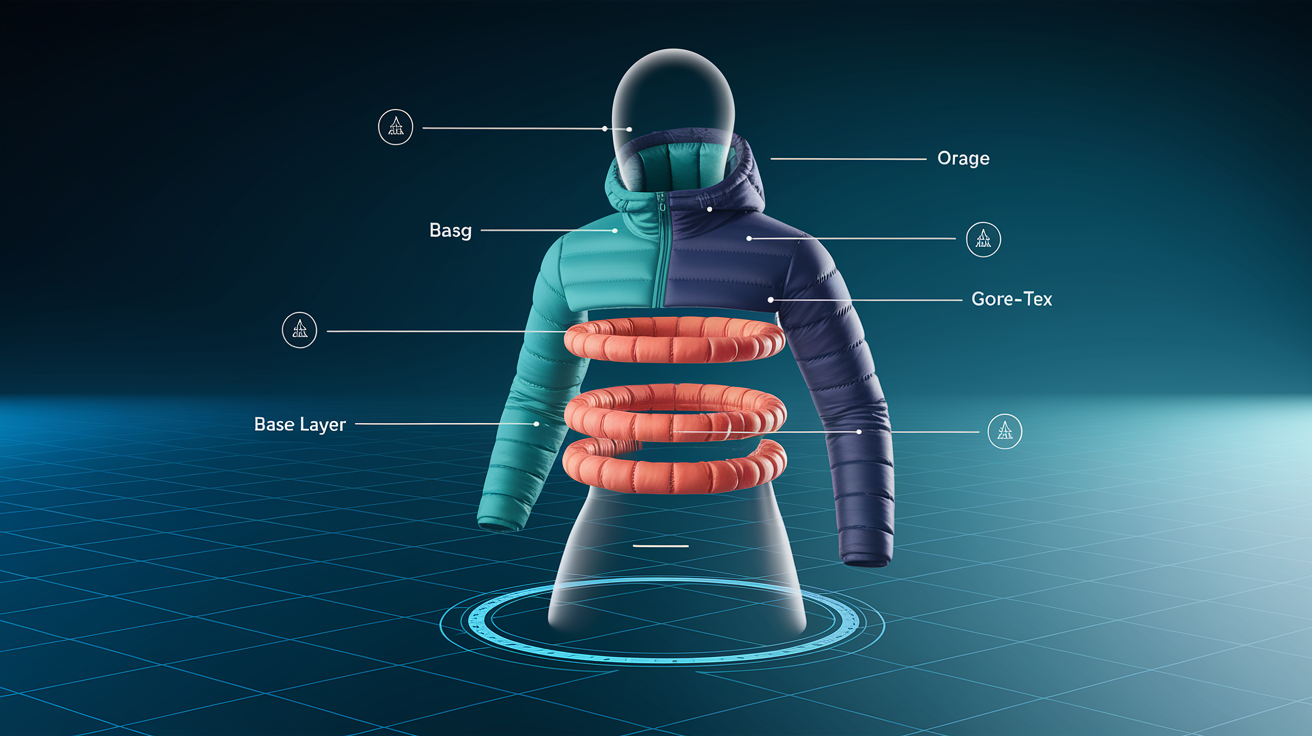
Layering isn’t a nice to have in polar conditions. It’s the system that keeps you alive. Your body generates heat during exertion, then loses it fast when you stop moving or the wind picks up. A proper layering system lets you add or shed pieces quickly to prevent both hypothermia and dangerous sweat buildup that chills you from the inside.
Base Layers
Start with one full set of thermal long underwear as your absolute minimum. Pack one to two additional sets if your trip runs longer than a week or involves multi-day camping without laundry access. Choose merino wool for odor resistance and comfort across a wide temperature range, or go with polyester, nylon, or polypropylene synthetics if you sweat heavily. Synthetics wick moisture faster and dry quicker than merino.
Fit matters here. Base layers should be snug without restricting movement, and flatlock seams prevent chafing during long days. Look for brands like Icebreaker, Smartwool, or Patagonia Capilene. If you’re prone to cold, size up slightly on the bottom half so you can layer a second base layer underneath on the coldest mornings.
Minimum quantity: 1 full set (top plus bottom).
Recommended for trips over 7 days: 2 to 3 full sets.
Material priorities: moisture-wicking, fast-drying, odor-resistant, flatlock or minimal seams.
Insulation / Midlayers
Pack one to two midweight pullovers or hoodies. Fleece or synthetic works equally well. Add one packable down or down-alternative insulated jacket. The pullovers are your active insulation, you’ll wear them while moving, and they breathe well enough that you won’t overheat. The insulated jacket is your static layer for standing around during wildlife observation, camp setup, or waiting for a helicopter transfer.
Down offers the best warmth to weight ratio and compresses small, but it loses insulating power when wet. If you expect wet snow, sleet, or regular Zodiac spray, choose a down alternative like PrimaLoft or a synthetic fill jacket (Patagonia Nano Puff, Arc’teryx Atom LT) that retains warmth even when damp. On extreme-cold overland expeditions where precipitation is minimal and temps stay well below freezing, a 700 to 900 fill-power down jacket is hard to beat.
Core midlayer: 1 to 2 fleece or synthetic pullovers (Patagonia R1, similar weight).
Insulated layer: 1 packable jacket (down or synthetic, depending on expected moisture).
Fit rule: midlayers should layer comfortably under your outer shell without restricting arm movement or creating pressure points under pack straps.
Outer Shell System
Your outer shell is the final barrier between you and wind, snow, and sea spray. You need one hooded, fully waterproof, windproof jacket. Gore-Tex or an equivalent membrane, sized roomy enough to fit all your midlayers underneath without binding at the shoulders or elbows. The hood must be large enough to fit over a warm hat, and adjustable enough to stay put in high wind.
Pair the jacket with one set of waterproof and breathable shell pants (also Gore-Tex or equivalent) cut large enough to pull on over your base layers, midlayers, and the tops of your knee-high boots. On Zodiac transfers and wet landings, these pants are mandatory. You will get soaked otherwise. Pack a second pair of waterproof gloves or mittens as a backup, because wet hands in −20°F can go from uncomfortable to dangerous in under ten minutes.
Jacket: 1 hooded waterproof and windproof shell, roomy fit, pit zips helpful for ventilation.
Pants: 1 pair waterproof shell pants, full-length side zips make them easier to pull on over boots.
Redundancy: doubles of gloves and mittens and an extra warm hat. If one pair gets wet, you need a dry backup immediately.
Footwear and Lower-Body Protection for Extreme-Cold Expeditions

Your feet carry you across ice, tundra, and ship decks slick with seawater. Footwear decisions make the difference between confident movement and blisters, cold toes, or worse. For most polar ship-based expeditions, one pair of knee-high fully waterproof rubber or muck boots handles Zodiac transfers and wet shore landings. Brands like Bogs, XtraTuf, and Honeywell make insulated versions that work well in temperatures near freezing. Many expedition operators provide or rent these boots to passengers.
If your trip includes extended overland travel, glacier crossings, or camps in areas where temps routinely hit −30°F to −40°F, you’ll need dedicated insulated expedition boots rated to those temperatures. Look for mountaineering boots with removable liners, crampon compatibility, and proper insulation (Thinsulate, PrimaLoft, or equivalent). These boots are heavier and less flexible than muck boots, but they’re built for the kind of cold that turns regular footwear into frozen blocks.
For onboard ship wear, pack one pair of comfortable closed-toe shoes with quality rubber soles. Trail runners, approach shoes, or casual hikers (Merrell, Salomon, Danner). Ship decks can be wet and the stairs steep, so skip anything with an open heel, smooth sole, or no ankle support.
Socks make or break foot warmth and blister prevention. Pack three to four pairs of tall merino wool socks as your primary insulation, and pair each with a thin silk or polypropylene liner sock. The liner wicks moisture away from your skin, and the friction between liner and outer sock reduces blister formation. Bring one extra pair of each and keep a dry set in your daypack at all times. If your feet get wet and you can’t change socks, cold becomes a real problem fast.
Primary boots: 1 pair knee-high waterproof muck or rubber boots (often provided or rented on ship expeditions).
Extreme-cold option: 1 pair insulated −40°F mountaineering boots (for overland polar travel).
Ship shoes: 1 pair closed-toe, rubber-soled comfortable shoes.
Socks: 3 to 4 pairs tall merino wool plus 3 to 4 pairs thin liners, rotate and double-layer.
Gaiters: useful if hiking through deep snow, helps keep snow out of boot tops.
Crampon compatibility: check if your boots accept strap-on or step-in crampons if glacier travel is planned.
Blister prevention: trim toenails before departure, break in boots at home, apply foot powder or lubricant to high-friction zones (heels, ball of foot).
Hand, Head & Face Protection for Polar Conditions

Your extremities lose heat faster than your core, and frostbite hits exposed skin in minutes when air temperature drops below −20°F and wind is blowing. Waterproof ski mittens or gloves are non-negotiable. Pack one to two pairs, and pair them with thin polypropylene or merino liner gloves. Mittens keep fingers warmer than gloves because your fingers share heat, but gloves give you more dexterity for zippers, camera controls, and adjusting gear. If you run cold or expect the worst conditions, choose mittens and accept the tradeoff.
Your head and neck need coverage that you can adjust fast. Bring one warm hat or beanie that covers your ears and fits snugly enough that it won’t blow off in wind. A balaclava or windproof neck gaiter (buff) is essential for protecting your face, nose, and mouth when the wind picks up or temps drop unexpectedly. You should be able to pull it up over your nose and mouth in seconds, then drop it back down when you warm up or start sweating.
Eyewear does two jobs. It protects against UV reflection off snow and ice (which can cause snow blindness), and it shields your eyes from wind and blowing snow. Pack one to two pairs of polarized sunglasses with full UV protection and good side coverage to block glare. Add one pair of ski goggles for Zodiac cruising in blowing snow or high wind. Sunglasses aren’t enough when ice crystals are hitting your face at 30 mph. Use an eyewear retainer (Croakies or similar) so you don’t lose glasses overboard or in the wind.
Camping & Shelter Gear for Sub-Zero Polar Environments

If your expedition includes camping in polar conditions, your tent, sleeping system, and stove become your survival tools, not just comfort items. A four-season tent rated for high winds and heavy snow load is the only safe option. Three-season tents collapse under snow weight and can’t handle sustained polar wind. Look for tents with reinforced pole sleeves, multiple guy-out points, and vestibules for gear storage and cooking in bad weather. Brands like Hilleberg, The North Face, and Mountain Hardwear make expedition-grade models that won’t fail when you need them most.
Your sleeping bag must be rated to the coldest temperature you expect, with a safety margin. For polar camping where temps can hit −30°F to −40°F, choose a bag with a comfort rating at or below that threshold. Down fill-power between 700 and 900fp gives you the best warmth to weight ratio and packability, but only if you can keep it dry. In wet or coastal conditions, a high-performance synthetic bag rated to the same temperature is the safer choice. It insulates when damp and dries faster than down.
Sleeping pads are as important as the bag itself because cold ground pulls heat out of your body all night. You need a pad with an R-value of at least 5. For extreme cold many experienced polar travelers layer two pads, one closed-cell foam (like a Therm-a-Rest Z Lite) for durability and ground insulation, topped with an inflatable insulated pad (like a Therm-a-Rest NeoAir XTherm) for comfort and additional R-value. If you puncture the inflatable, the foam pad keeps you off the frozen ground.
Cooking and melting snow for water requires a liquid-fuel stove. Canister stoves lose pressure and fail in extreme cold. White gas (Coleman fuel) or multi-fuel stoves (MSR WhisperLite, Primus Omnifuel) are the standard. Bring spare parts (O-rings, fuel-line cleaning wire, jet cleaning tool) and pack fuel conservatively. You’ll need more than you think because melting snow is fuel-intensive.
Tent: four-season model, reinforced poles, snow stakes, multiple guy lines and tie-outs.
Sleeping bag: −30°F to −40°F comfort rating, 700 to 900fp down or equivalent high-performance synthetic.
Sleeping pad: R-value ≥5, consider layering a closed-cell foam pad plus inflatable insulated pad.
Stove: liquid-fuel (white gas or multi-fuel) with spare parts and cleaning kit.
Snow anchors: dedicated snow stakes and extra cord for storm guy-outs.
Repair kit: tent pole sleeve, duct tape, sewing kit, sleeping pad patch kit.
Navigation, Communication & Emergency Signaling for Polar Travel

Polar environments offer no landmarks, no cell service, and weather that can reduce visibility to zero in minutes. A GPS device is your primary navigation tool, but it’s not enough on its own. Carry paper maps of your route and a compass as backups. Batteries die in cold, electronics fail, and satellites can be obscured. Know how to use all three before you leave home.
For remote expeditions beyond VHF radio range of your ship or base camp, a personal locator beacon (PLB) or two-way satellite messenger (Garmin inReach, SPOT) is mandatory safety equipment. A PLB sends a distress signal with your GPS coordinates to rescue authorities when you activate it. A satellite messenger lets you send pre-set or custom text messages, check in with your team, and request help in non-life-threatening situations. If your expedition operates in truly remote areas with multi-day response times, add a satellite phone for voice communication. It’s expensive to rent or buy, but it’s the only way to coordinate a complex rescue or get real-time weather updates when you’re days from the nearest human.
Cold kills batteries fast. Keep your GPS, PLB, and headlamp batteries warm by storing them inside your jacket or sleeping bag when not in use. Bring a minimum of one full set of spare batteries for every device, and double that if your trip runs longer than a week. A headlamp is essential for any polar travel extending into darker months (autumn through spring in the Arctic, or any time in the Antarctic interior). Pack one with a red-light mode to preserve night vision and bring spare bulbs if your model isn’t LED.
GPS device: handheld unit with preloaded maps, plus waypoints for camp, caches, emergency sites.
Paper maps and compass: waterproof maps, know your declination, practice navigation before departure.
PLB or satellite messenger: register before departure, test signal, carry in accessible pocket.
Satellite phone: for expeditions beyond radio range, confirm coverage for your polar region.
Headlamp: LED preferred, red-light mode, bring spare batteries stored warm.
Medical, Safety & Rescue Equipment for Polar Expedition Readiness
A comprehensive expedition first aid kit is not optional. Your kit should include bleeding control supplies (gauze, pressure bandages, hemostatic agents), wound care (antiseptic, adhesive strips, blister treatments), medications for common issues (pain relief, anti-inflammatory, antihistamine, anti-diarrheal), and any prescription medications you or your team members need. Pack a 7 to 10 day buffer supply of all prescriptions in case weather or logistics delay your return.
Seasickness is near-universal on polar voyages, especially in the Drake Passage or rough Arctic crossings. Bring your preferred motion-sickness medication (Bonine, Dramamine, or a prescription scopolamine patch) and start taking it before you board if you’re prone to nausea. Chemical hand and foot warmers (HotHands or similar) are lightweight insurance against cold fingers and toes. Toss a few in your pockets and daypack.
Hypothermia and frostbite are the two environmental injuries you must be prepared to recognize and treat in the field. Hypothermia symptoms progress from shivering and confusion to loss of coordination and unconsciousness. Frostbite presents as white or grayish-yellow skin, numbness, and hard or waxy texture. Your first aid kit should include a hypothermia wrap or emergency blanket, and every team member should know the basics: get the person out of the wind, remove wet clothing, add dry insulation, give warm (not hot) liquids if they’re conscious, and activate rescue if symptoms don’t improve.
If your route includes glacier travel, you need a crevasse rescue kit and the training to use it. At minimum that means a mountaineering harness, ice axe, crampons, climbing rope (dry-treated), carabiners (locking and non-locking), and prusik cords or mechanical ascenders. Crevasse falls are survivable if your team can execute a pulley-assisted rescue, but only if you’ve practiced the system before you need it in a life-or-death moment. If you don’t have that training, hire a guide who does.
First aid supplies: bleeding control, wound care, blister kit, pain and anti-inflammatory meds, prescription buffer.
Seasickness meds: Bonine, Dramamine, or scopolamine patch, start before boarding.
Chemical warmers: HotHands for hands and feet, multiple packets per person per day.
Hypothermia kit: emergency blanket, dry insulation layers, warm fluids.
Frostbite recognition: know the signs, protect face, fingers, and toes, rewarm gradually, never rub frozen skin.
Crevasse rescue gear: harness, ice axe, crampons, rope, carabiners, prusiks. Only if trained or guided.
Training requirement: team members must know rescue protocols, or contract professional guides.
Food, Calories & Hydration Planning for Polar Expeditions

Polar expeditions burn calories at a rate most people underestimate. Hauling sleds, setting up camp in high wind, and keeping your body warm in −30°F can push daily calorie needs to 4,000 to 6,000 kcal depending on your body weight, pace, and exertion level. If you under-pack food, you’ll run out of energy, lose body heat faster, and put yourself at risk.
Pack calorie-dense, compact, non-perishable foods that don’t freeze solid or require complex preparation. Nuts, nut butters, energy bars, freeze-dried meals, chocolate, and dried fruit are expedition staples. Freeze-dried meals are lightweight and only need boiling water, but they’re low on fat. Add a scoop of butter, olive oil, or coconut oil to boost calories and improve satiety. Breakfast should be hot and high-calorie (oatmeal with nuts and dried fruit, plus butter), lunch can be cold and fast (bars, cheese, salami, crackers), and dinner should be warm and substantial (freeze-dried entrée, soup, hot chocolate).
Hydration in polar conditions is tricky because liquid water freezes and melting snow takes time and fuel. Carry at least one insulated thermos filled with warm water or tea, and refill it at every meal. Drink before you feel thirsty. Cold air is extremely dry, and you lose moisture with every breath. Electrolyte powders (Nuun, LMNT, or similar) help maintain hydration and energy, especially if you’re sweating under layers during exertion.
Calorie target: 4,000 to 6,000 kcal/day depending on activity level and body weight.
High-calorie foods: mixed nuts, almond or peanut butter, energy bars, freeze-dried meals, chocolate, dried fruit, cheese, salami.
Fat boosts: add butter, olive oil, or coconut oil to meals for extra calories and warmth.
Breakfast: hot oatmeal, instant coffee or tea, dried fruit, nuts.
Lunch: energy bars, crackers, cheese, nut butter packets (eat on the move).
Dinner: freeze-dried entrée plus soup, hot chocolate or tea.
Hydration: insulated thermos, electrolyte powder, drink proactively, never wait until thirsty.
Electronics & Battery Management in Extreme Cold

Cold weather is brutal on electronics. Lithium-ion batteries lose 20 to 40 percent of their capacity when temperatures drop below freezing. In −20°F to −40°F conditions they can drain in minutes if left exposed. If you’re bringing a camera, GPS, satellite messenger, or headlamp, you need a battery management strategy that assumes every battery will fail faster than the manufacturer’s rating suggests.
For cameras, bring three to four spare batteries per body and keep them warm inside your jacket, close to your body. Swap a warm battery in just before you shoot, then rotate the cold battery back inside your layers to rewarm. Store batteries in an interior pocket, not your pack. The same rule applies to GPS units, headlamps, and satellite devices. Cold batteries are dead batteries, so keep spares warm and swap them frequently.
Power banks are helpful for USB-rechargeable devices, but not all power banks work in extreme cold. Look for models rated for low-temperature operation and keep them insulated inside your jacket when not in use. Bring multiple high-capacity power banks if you’re carrying a phone, camera, GPS, and satellite messenger, because you won’t have wall power for days at a time on overland expeditions.
| Device | Cold Risk | Mitigation Strategy |
|---|---|---|
| Camera (DSLR/mirrorless) | Battery drains in minutes; LCD screens slow or freeze | Carry 3 to 4 spare batteries inside jacket; swap warm battery in before shooting; store camera in insulated case between uses |
| GPS / Satellite Messenger | Battery life drops 30 to 50%; screen becomes unresponsive | Keep device inside jacket when not navigating; bring 2 to 3 spare battery sets; use sparingly and mark waypoints in advance |
| Smartphone | Shuts down in cold; touchscreen fails in gloves | Use airplane mode to save power; keep phone inside jacket; bring thin touchscreen-compatible glove liners; rely on dedicated GPS instead of phone navigation |
Voltage and charging logistics matter when you’re staying in gateway hotels before or after your expedition. Many polar gateway towns use 220V power with European-style two-pin plugs. Bring a universal adapter and a voltage converter if your devices aren’t dual-voltage (110V to 240V). Check the label on your charger. Most modern USB chargers and laptop power bricks handle dual voltage automatically, but older or specialized equipment may not.
For photography, bring extra SD cards (or CFexpress, depending on your camera) and an external SSD or portable hard drive for backups. Don’t rely on cloud storage. Internet access in polar regions ranges from slow to nonexistent. Download photos to your laptop or drive every night so you’re not carrying weeks of irreplaceable images on a single fragile memory card. Pack lens cleaning cloths, a blower brush, and keep your camera in a stuff sack or insulated pouch when you’re not shooting to prevent condensation and frost buildup on the lens.
Luggage, Weight & Packing Optimization for Polar Gear

Polar expeditions often begin with a charter flight to a remote gateway town, and those flights enforce strict per-passenger weight limits. Commonly 23 kg (50 lb) per checked bag, sometimes less. If you show up 5 kg over, you’ll be repacking on the tarmac or paying steep overweight fees, assuming there’s even room on the plane. Soft-sided duffels in the 65L to 100L range are the standard because they’re easier to stow on small aircraft, Zodiacs, and cramped ship cabins than hard-shell roller bags.
Good options include the Patagonia Black Hole duffel (70L or 100L), The North Face Base Camp duffel (71L), or the Osprey Transporter (65L). These bags are semi-waterproof, have backpack straps for easier carrying, and compress when not fully loaded. Leave 10 to 15 percent of your bag’s volume empty when you pack out. Many expedition operators provide a parka at the destination, and you’ll need room to bring it home.
Use compression sacks for sleeping bags, down jackets, and extra clothing to maximize space and keep items organized. Waterproof stuff sacks or dry bags (10L to 20L sizes) are essential for protecting electronics, batteries, first aid supplies, and any item that can’t get wet. On Zodiac transfers and shore landings, sea spray is constant. Even “waterproof” duffels aren’t fully sealed. Pack your most critical gear inside nested dry bags so it stays dry no matter what.
Pack in layers of accessibility. Items you need every day (gloves, hat, sunglasses, snacks, water bottle, camera) go in your daypack. Items you need every few days (extra socks, midlayer, headlamp, first aid kit) go near the top of your duffel. Gear you only need in camp or emergencies (sleeping bag, stove, repair kit) goes at the bottom. If you have to dig through your entire bag to find your warm hat on a windy deck, you’ve packed wrong.
Recommended duffel size: 65L to 100L soft-sided, waterproof or water-resistant.
Target weight: ≤23 kg (50 lb) per checked bag, verify operator-specific limits before packing.
Compression sacks: for sleeping bags, insulated jackets, extra clothing.
Dry bags: 10L to 20L sizes for electronics, batteries, documents, first aid, camera gear.
Packing order: daily-use items in daypack, frequent-access items at top of duffel, camp and emergency gear at bottom.
Biosecurity, Environmental Protocols & Prohibited Items
Polar ecosystems are fragile, legally protected, and extremely vulnerable to invasive species. Even a single seed stuck in your boot tread or a fleck of soil on your tent can introduce non-native plants or pathogens that disrupt the local environment. Before you board your expedition, you’ll be required to clean all footwear, outerwear, camping gear, and backpacks to remove any organic contaminants. Mud, plant matter, seeds, or soil.
Scrub boot treads with a stiff brush and soapy water, then rinse and dry them completely. Inspect all Velcro closures, zippers, and seams for trapped debris. Some operators require you to present your gear for inspection before departure. If it’s not clean, you won’t be allowed to bring it ashore. This isn’t a formality. It’s environmental law in the Antarctic Treaty region and many Arctic protected areas.
Do not pack cotton clothing. Cotton absorbs moisture, loses all insulating value when wet, and takes forever to dry in cold conditions. Wet cotton against your skin accelerates heat loss and increases your risk of hypothermia. Stick to merino wool, synthetic insulation, fleece, and technical fabrics designed for moisture management. If you’re unsure whether an item is cotton, check the label. If it says 100 percent cotton or a cotton blend, leave it home.
On-Ship & Camp Comfort Items for Polar Expeditions
Life on an expedition ship or in a polar camp isn’t all survival mode. You’ll spend hours inside, and a few small comfort items make downtime far more pleasant. Pack casual indoor clothing: light shirts, a comfortable pair of pants or jeans, and a warm fleece or sweater for lounging in the ship’s common areas. Ship interiors are heated, so you won’t need heavy insulation layers inside, but temperatures vary and you’ll want the option to add a layer.
Bring toiletries and personal care items: high-SPF sunscreen (SPF 30 or higher, snow and ice reflect UV and double your exposure), lip balm with SPF, and a good moisturizing lotion for your hands and face. Polar air is extremely dry, and windburn combined with sun exposure will crack your skin fast. If your expedition includes a sauna, hot tub, or the option for a polar plunge, pack a swimsuit. Some people do a single polar plunge as a bucket-list moment, others use shipboard saunas daily to warm up after wet landings.
An eye mask and earplugs are small items that make a big difference. Polar summers bring 24-hour daylight, and even blackout curtains don’t block all the light. If you’re a light sleeper or sensitive to noise (ship engines, hallway conversations, neighbors), earplugs let you actually rest. Bring a small daypack (20L to 30L) for shore excursions. It should be waterproof or have a rain cover, and big enough to carry extra layers, water, snacks, camera, and binoculars.
Casual clothing: light shirts, pants, warm fleece for indoor wear.
Toiletries: SPF 30 plus sunscreen, lip balm with SPF, hand and face moisturizer.
Comfort items: swimsuit (for sauna or polar plunge), eye mask, earplugs.
Daypack: 20L to 30L waterproof pack for shore excursions, layers, snacks, camera, binoculars.
Rental vs. Buying Polar Gear
If this is your first polar expedition and you don’t plan to make cold-weather travel a regular habit, renting gear makes financial and logistical sense. Many expedition operators provide or offer rental options for the most expensive and bulky items: insulated parkas, knee-high waterproof boots, and sometimes technical camping gear like tents, sleeping bags, and stoves. Renting reduces your upfront cost, keeps your checked luggage under weight limits, and lowers biosecurity risk because rental gear is pre-cleaned and inspected.
Parkas and boots are the two most common rental items. Expedition-grade parkas can cost $400 to $800 new, and you’ll wear it for a week then probably never again unless you live in the Arctic. Same for knee-high insulated muck boots. They’re $150 to $250, awkward to pack, and useless back home. If your operator includes a parka or offers boot rentals, take them up on it.
Base layers, midlayers, gloves, hats, and socks are personal-fit items that you’ll be more comfortable owning. They’re also lightweight, reusable for other cold-weather activities, and relatively affordable. If you’re planning multiple polar trips or already own quality cold-weather clothing from skiing or mountaineering, bring your own and skip the rental fees. For technical camping gear, rental makes sense if you’re joining a guided expedition that provides group equipment. But if you’re organizing your own unsupported polar traverse, you’ll need to own (and trust) every piece of your shelter, sleep, and cooking system.
Final Words
Start by packing the survival pieces: the layering system, insulated boots, mittens, goggles, and a solid shelter with stove and sleeping system. These are what keep you warm and safe in −40°F conditions.
We walked through footwear, extremity protection, camp systems, navigation and comms, medical and rescue gear, food and batteries, packing strategy, biosecurity, comfort items, and when to rent versus buy.
Use this polar expedition packing list for extreme cold as your checklist, pack redundancies, test everything at home, and you’ll head out ready and confident.
FAQ
Q: What are the absolute essentials for extreme-cold polar expedition packing?
A: The absolute essentials for extreme-cold polar expedition packing are layered clothing, knee-high waterproof boots, insulated sleeping system, navigation and comms redundancy, full medical and rescue kit, high-calorie food, and waterproof storage.
Q: How should I build a layering system for −40°F polar conditions?
A: You should build a layering system for −40°F polar conditions with merino or synthetic base layers, fleeces plus a packable down/synthetic midlayer, and a waterproof, windproof outer Gore‑Tex shell with a helmet-compatible hood.
Q: What base layer materials and quantities should I bring?
A: You should bring merino or polyester base layers with flatlock seams, typically 1–3 full sets, prioritizing moisture control and quick drying to prevent sweat from cooling you during stops.
Q: What midlayers and outer shell specs matter most?
A: Midlayers and outer shell specs that matter most include one to two fleeces, a high-fill down or synthetic jacket for insulation, and a waterproof breathable Gore‑Tex outer shell sized for layering and mobility.
Q: What footwear and sock system is best for polar travel?
A: The best footwear and sock system for polar travel is knee-high waterproof boots with appropriate insulation, three to four merino socks plus thin liner socks, and gaiters for snow and crampon compatibility.
Q: How do I protect hands, head, and face from frostbite?
A: You protect hands, head, and face from frostbite with waterproof mittens over polypropylene liners, a windproof balaclava, an ear-covering beanie, UV sunglasses, and ski goggles for blowing snow and glare.
Q: What shelter and sleeping gear do I need for sub-zero camping?
A: You need a four-season tent, a sleeping bag rated to −30°F to −40°F, sleeping pads with R‑value ≥5 (double-pad system recommended), snow stakes, and a liquid-fuel stove for melting snow and cooking.
Q: Which navigation and communication devices are mandatory on polar trips?
A: Mandatory navigation and communication devices include a satellite GPS plus paper maps, a PLB or satellite messenger, a satellite phone if available, and a headlamp with cold-rated spare batteries.
Q: What medical and rescue equipment should I carry?
A: You should carry a full first-aid kit with cold-injury treatments, chemical hand and foot warmers, prescriptions with a 7–10 day buffer, and crevasse-rescue gear like harness, ropes, crampons, and appropriate carabiners.
Q: How many calories and what foods should I plan per day?
A: You should plan 4,000–6,000 kcal per day, favoring calorie-dense items like nuts, chocolate, cheese, nut butters, and freeze-dried meals, plus insulated containers to keep hydration from freezing.
Q: How do I manage electronics and batteries in extreme cold?
A: You manage electronics and batteries in extreme cold by carrying insulated battery storage, rotating spares inside your clothing to keep them warm, bringing multiple spares per device, and minimizing cold exposure during use.
Q: How should I pack and optimize luggage weight for polar gear?
A: You should pack and optimize luggage weight by using 65–100L soft-sided duffels, compression sacks and dry bags, prioritizing quick-access items on top, and staying within typical checked limits around 23 kg unless operator rules differ.
Q: Should I rent or buy polar gear for an expedition?
A: You should rent heavy or rarely used items like muck boots and parkas when available, buy personal-fit items like base layers and sleeping bags, and check operator gear lists to reduce weight and biosecurity risk.